
In the last segment of our Xamarin series we focused on creating the HelloWorld iOS application using Xamarin Studio. Based on the feedback from the previous article, I decided that in order not to deprive those who want to realize their projects in Visual Studio, I would dedicate today's segment just to them.
Xamarin: Hello world ve Visual Studiu (part 3)

Initial setup in Visual Studio
Although it may seem strange to some, the process of creating the first project in Visual Studio (hereinafter VS) is slightly different from creating a project in Xamarin Studio (hereinafter XS).
As stated earlier, besides a Windows computer with VS and Xamarin installed (in VS 2015 Xamarin is installed together with VS or it is possible to install it manually), you will also need a computer or virtual device with MacOS with XS, which is located in the same network as a Windows PC, for fully-fledged work with Xamarin. The interesting thing is that a project in VS can be built without MacOS, but the user does not have, for example, the possibility of debugging the project or running it on a simulator.
Before we get into the actual creating of a project, you need to connect both computers with a computer. This is possible using a special bridge, which is part of the Xamarin framework. In VS select the menu item Tools – Options, where you will search for Xamarin.
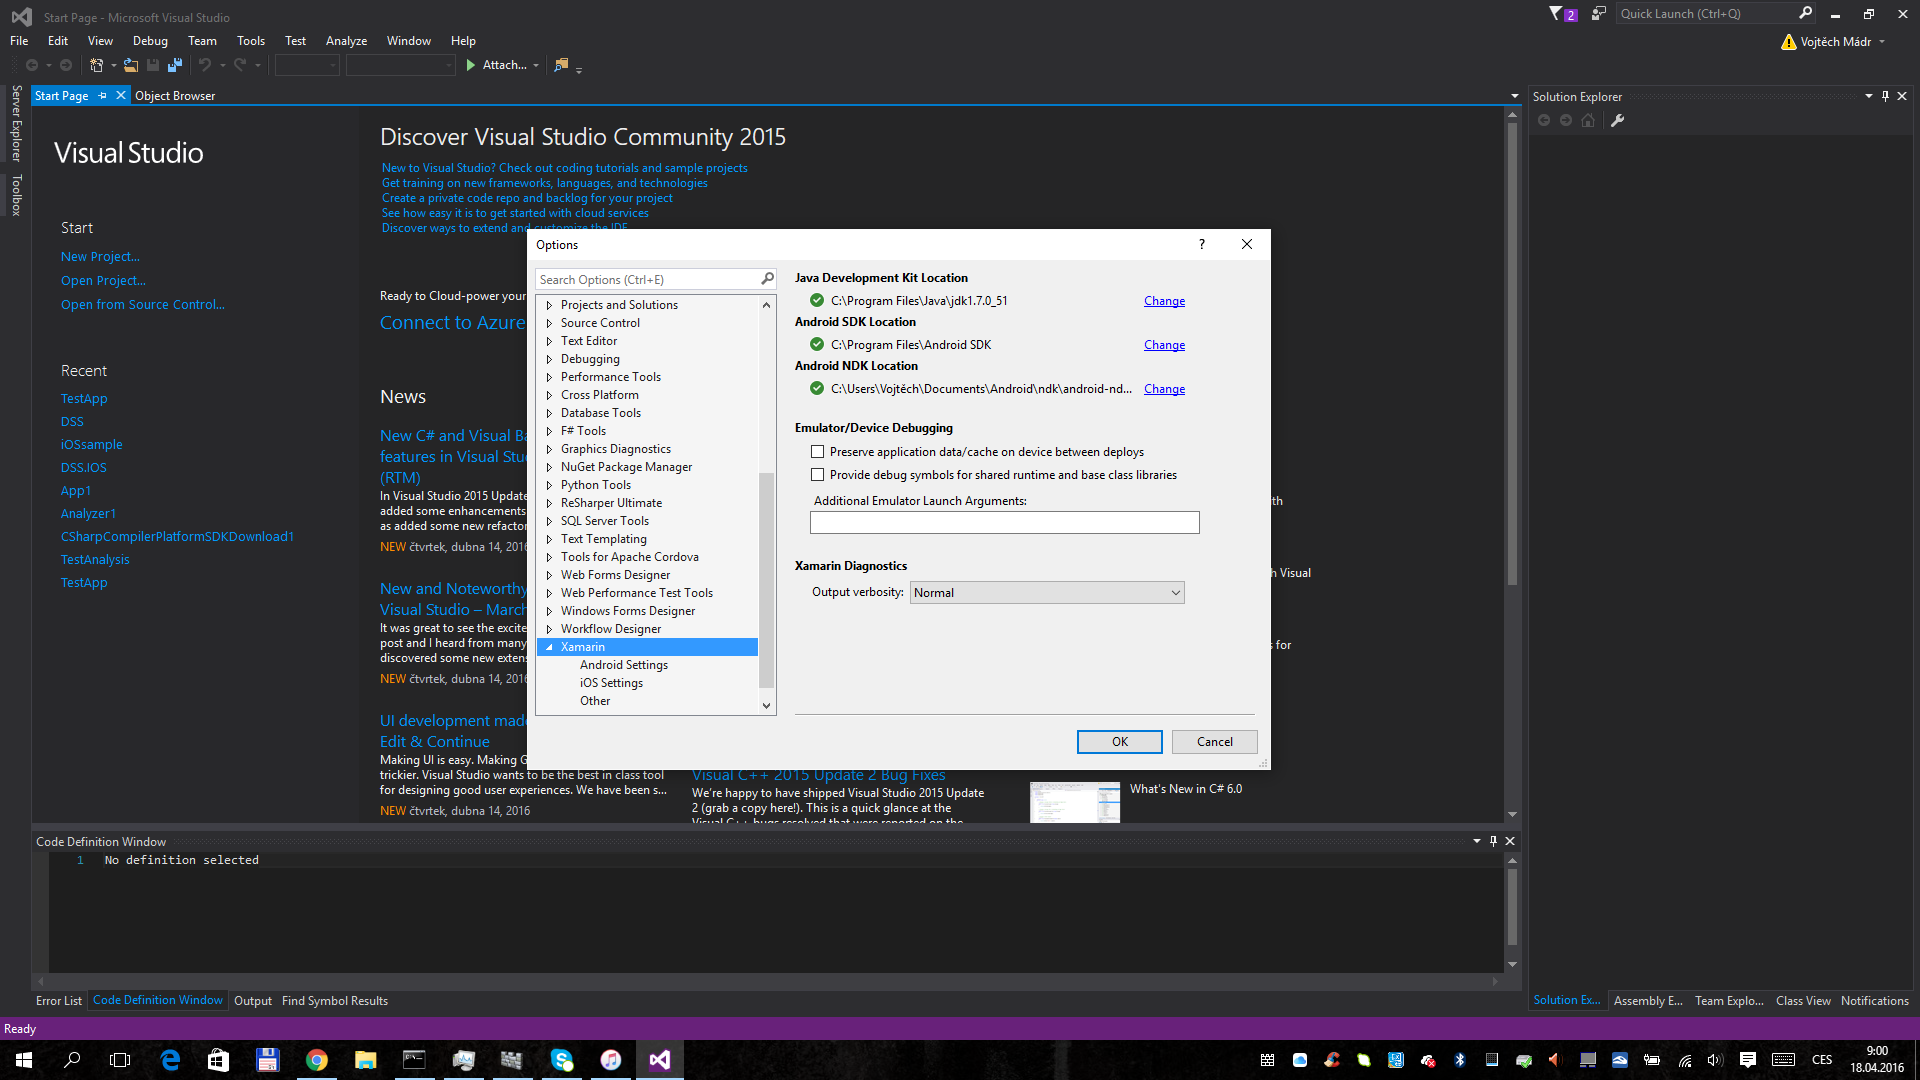
Xamarin in VS
In the next step you need to make a selection on the iOS settings menu and click on the Find Xamarin Mac Agent item. A table with all Mac OS computers on the network appears. Select the chosen item with a double click and you will be prompted to enter its username and password into the Mac system. If everything goes well, the connected icon will appear by yours on the list of computers. Now we can have a go at creating the first project.
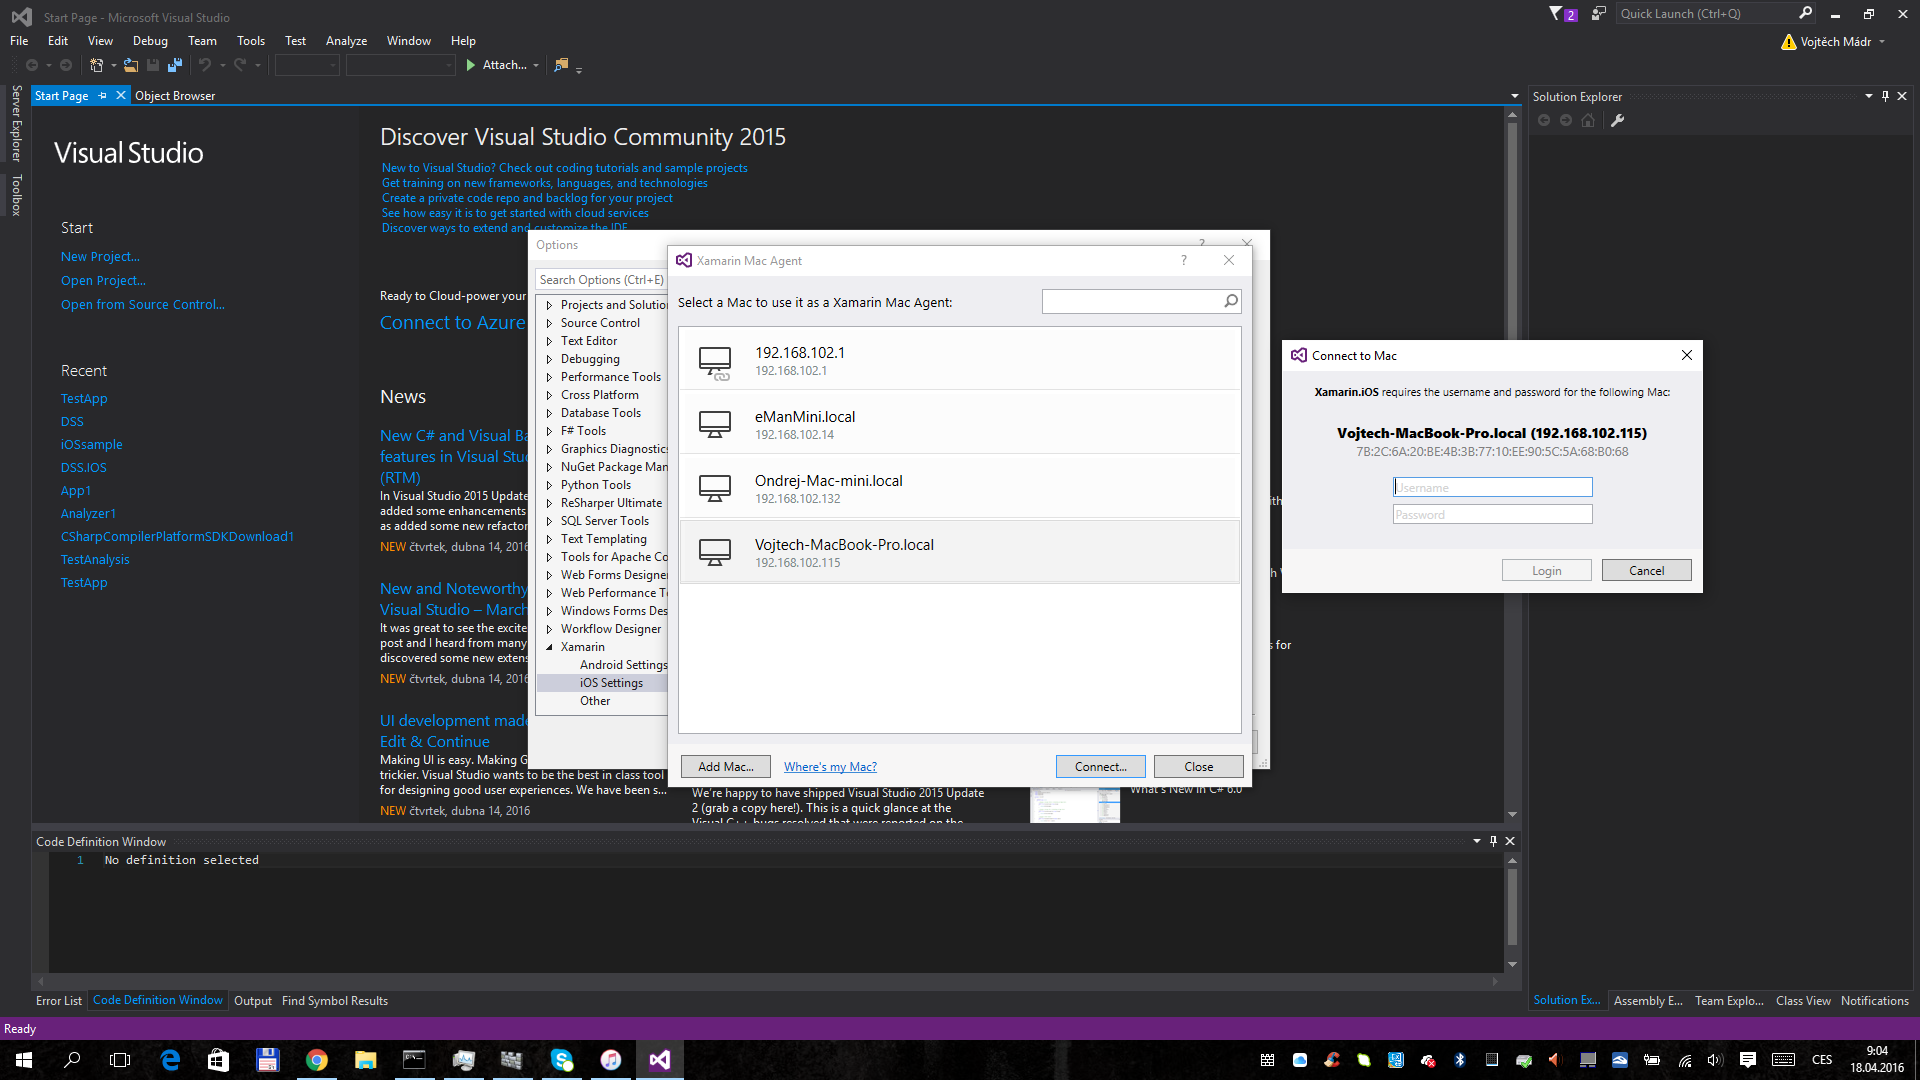
Pairing in VS
Hello World Visual Studio!
If the computers are connected, we can then venture into the creation of the project itself. In the menu we choose File – New – Project in the options available for new projects. It is necessary to search for the item iPhone and select BlankApp. You enter the application name and click on “Ok”.
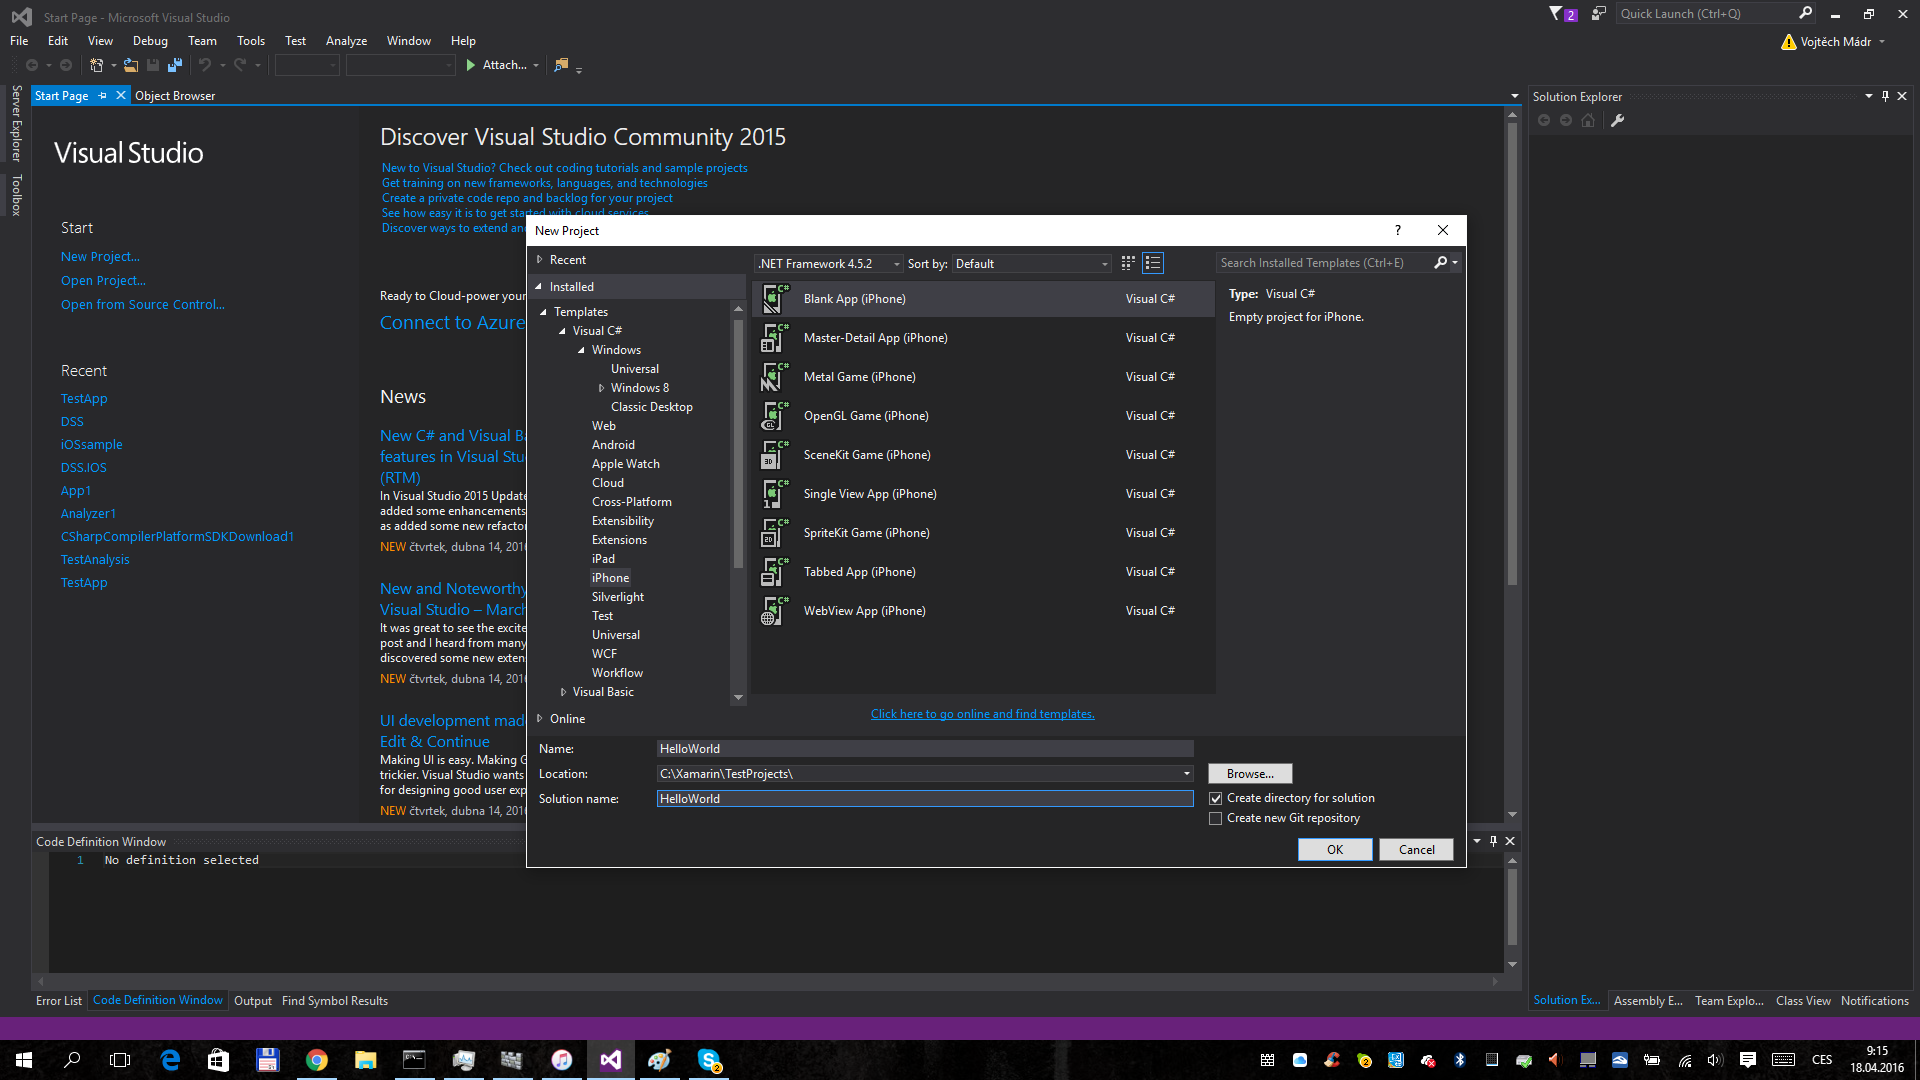
Creating a new project
It creates a new solution, which has the same structure as in XS Xamarin with the Xamarin welcome screen.
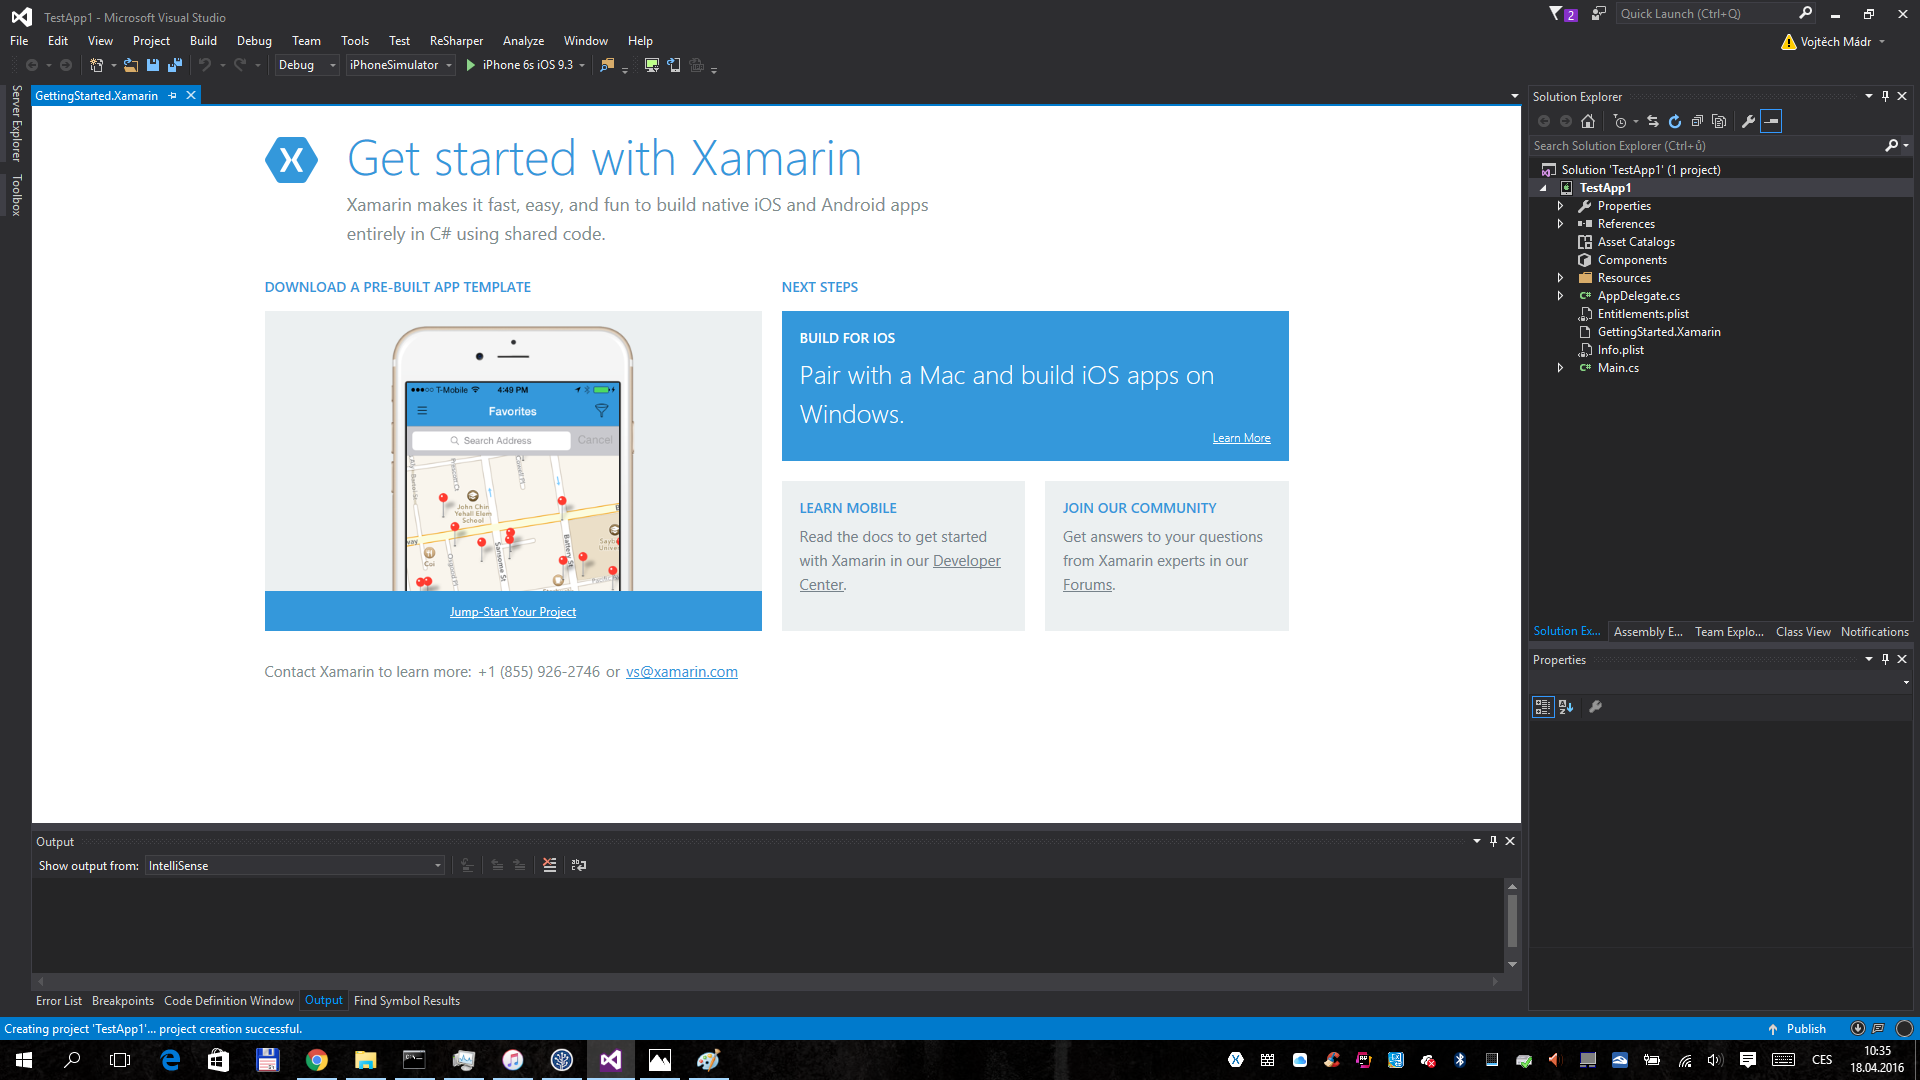
A new Xamarin iOS project
The next step is to create a ViewController (in XLS it is created automatically). You right click on our project and select Add – New Item, where you select the UIViewController category option. Name it and click add it with the Add button.
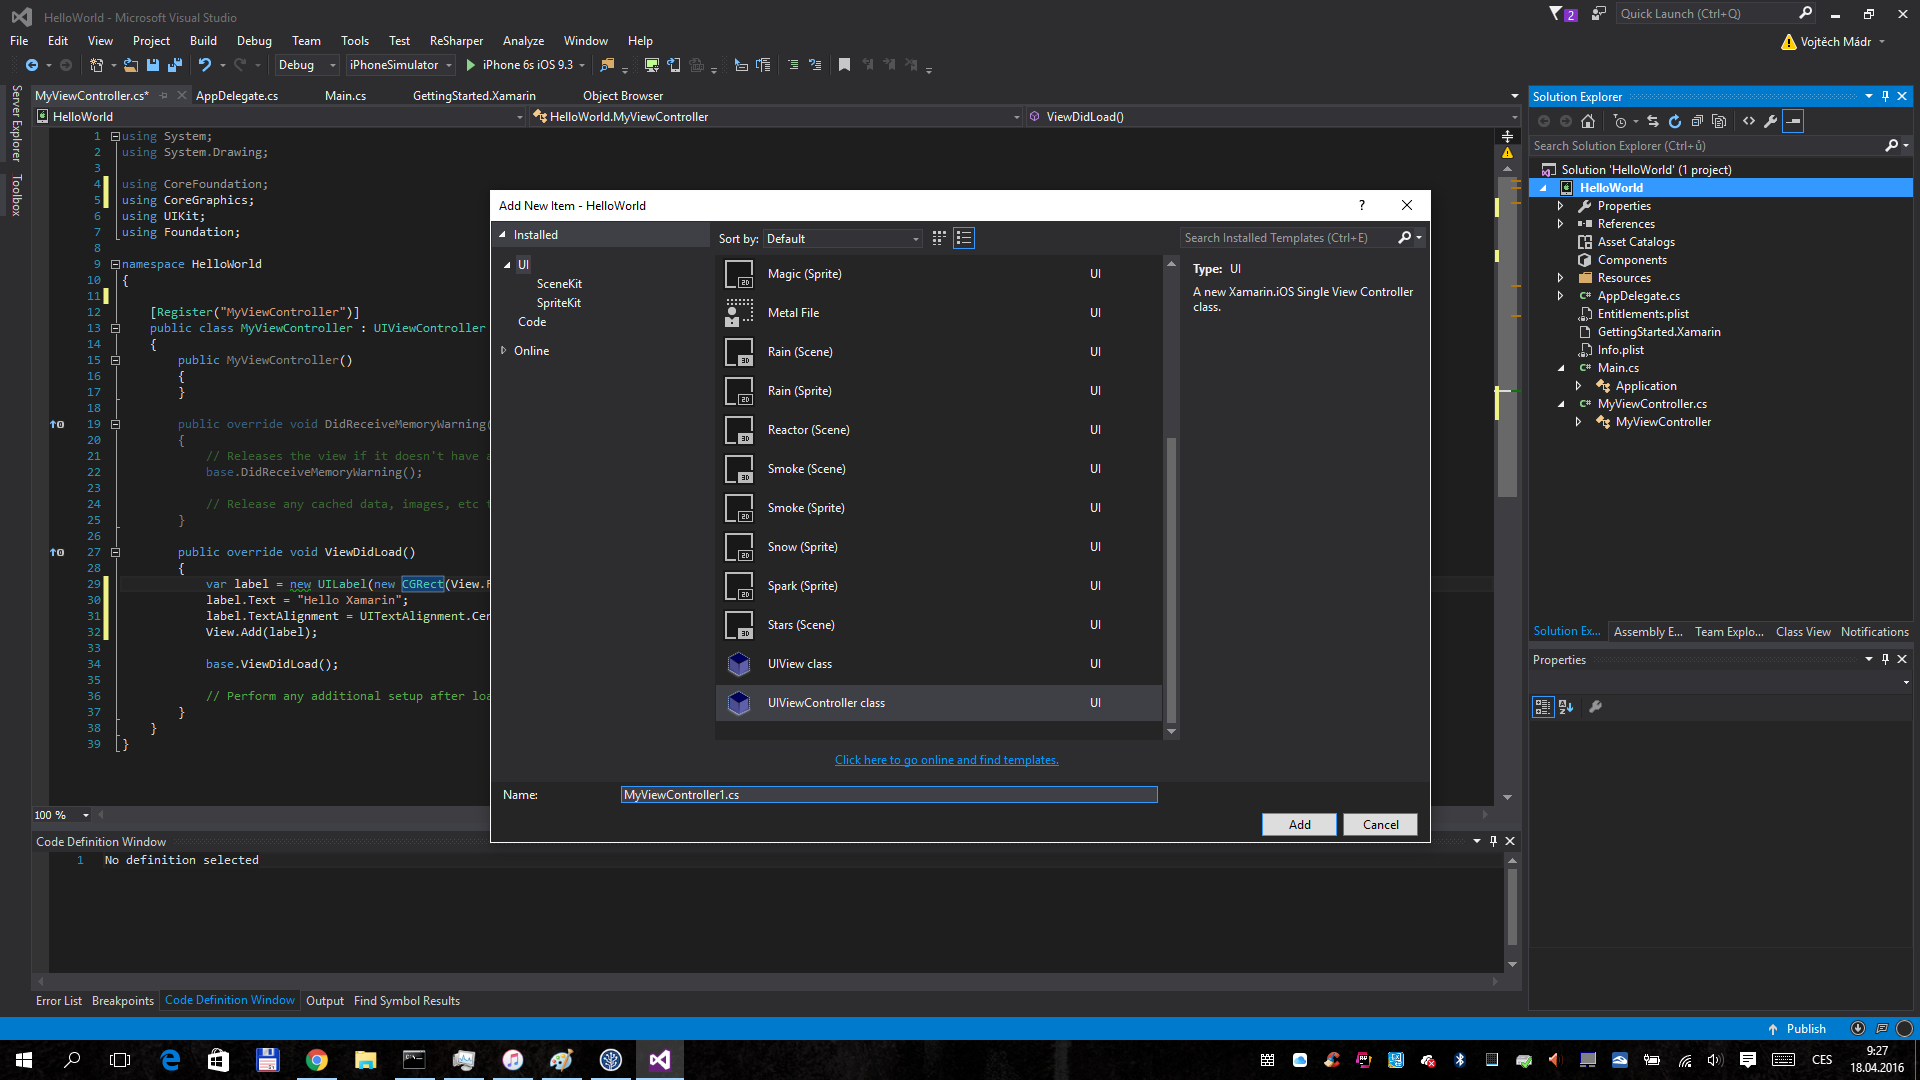
Adding a View Controller
Open the created file and delete everything up to the viewDidLoad method, to which you fill in a similar code as was used when creating the project in XS. The only difference is in changing the background color to white, as the standard ViewController has it set in black.
View.BackgroundColor = UIColor.White;

var label = new UILabel(new CGRect(View.Frame.Size.Width / 2 - 100, 0, 200, 100))

{

Text = "Hello Xamarin",

TextAlignment = UITextAlignment.Center,

TextColor = UIColor.Red

};

View.Add(label);
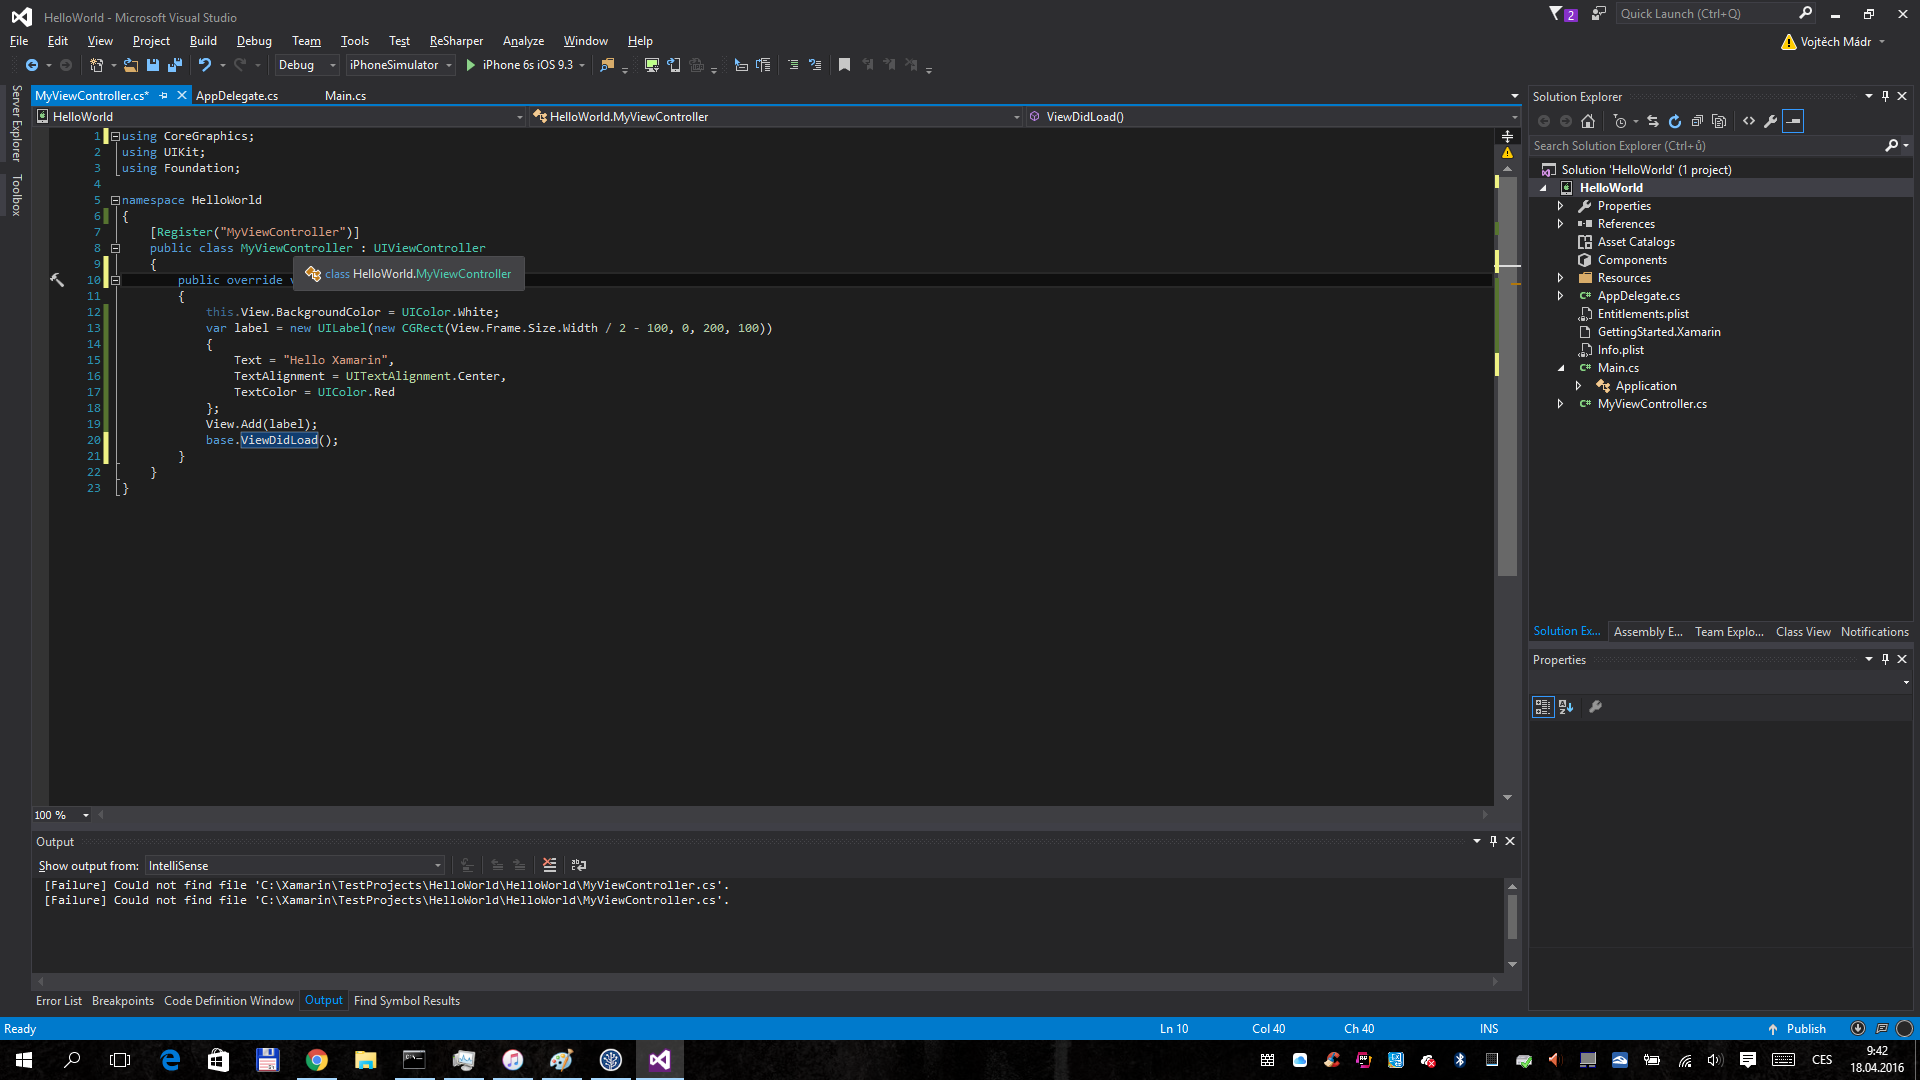
Composition of the View Controller
Upon project completion, just open the AppDelegate category and in the FinishedLaunching add the line:
Window.RootViewController = new MyViewController(); Where the name MyViewController will vary according to the name of the controller chosen by you.
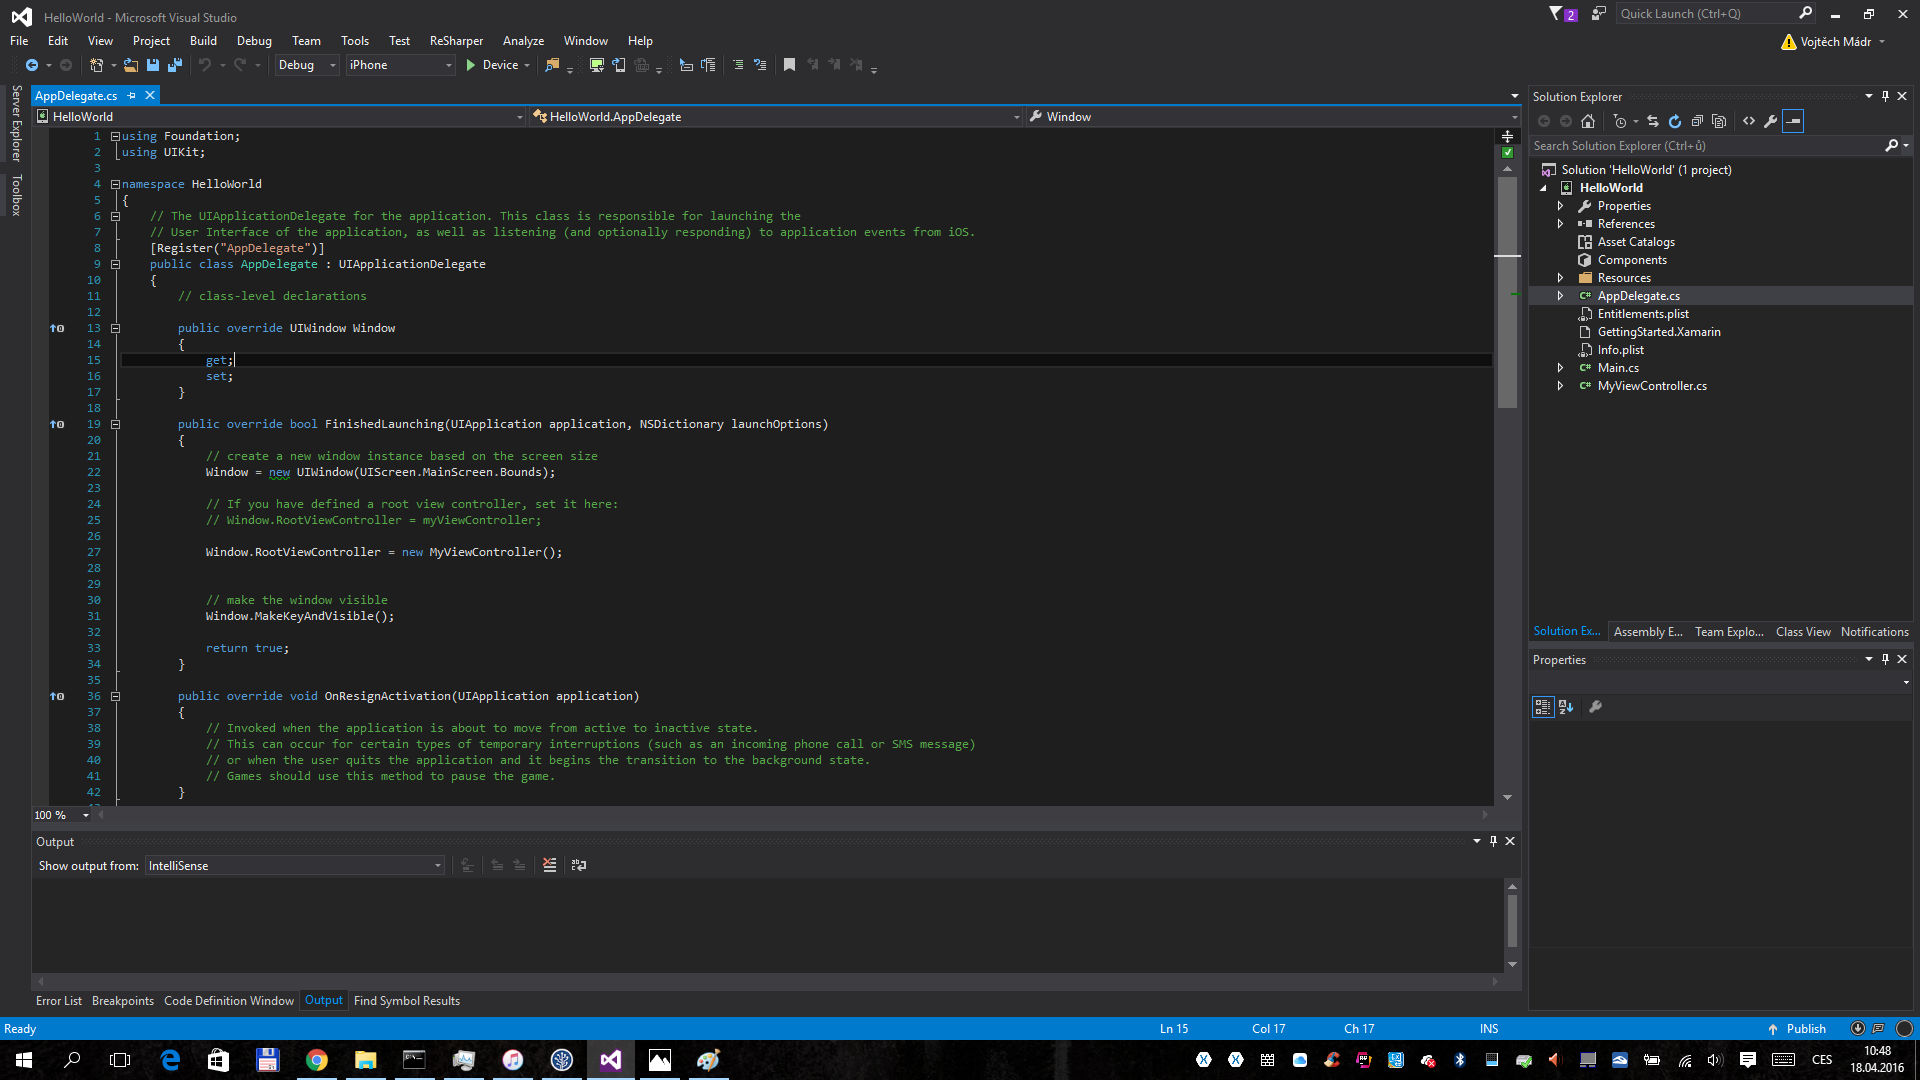
AppDelegate diagram
In conclusion, it is necessary to build the project in the settings to choose the device, on which you test the application and click start (or press F5). The result will look similar as in XS:

The next step
In the next section, you can look forward to creating Android projects (in XS and VS), followed by a thorough description of each item in the Xamarin iOS and Xamarin Droid Solution. Then, for example, we will have a look at available simulators for Xamarin and the principles of writing common parts and the MVVMCross and Xamarin Forms Framework.
The previous installment of the series:
Xamarin: Introducing a tool for cross-platform development of mobile applications (Part 1)