
In the last part of our series on the development of mobile applications at Xamarin, we briefly introduced Xamarin Framework. Now we’ll take a look at the initial steps that accompany the development of basic applications.
Xamarin: First steps (part 2)

Before we start the actual installation of the studio, it is necessary to ensure a few things:
- A real computer or a virtual unit with Mac OS X (needed for developing iOS applications)
- A real computer or a virtual unit with Windows (needed for developing Windows applications)
- Xcode
- Android SDK
- An account on Xamarin.com
If all the steps are fulfilled, you need to choose a development environment. Xamarin enables development in its own Xamarin Studio or by using Visual Studio. Apart from personal preference, the price of the license can also help when deciding what kind of environment to choose.
Xamarin offers four types of licenses, the prices of which increase according to the options that are available. For their brief description see the table.
[table id=6 /]
All these licenses are for one platform and it is clear from them that you can use Visual Studio for development from Business License and higher.
Hello World! v Xamarin Studiu
In the event that you “only” get the Indie license or you only have a computer with Mac OS X available, you need to use Xamarin Studio for development. This IDE is available for both the Mac OS X and Windows (only allows the creation of Android applications). Its downloading is possible via the Xamarin.com website.
After starting installation, Mono Framework, the libraries for Xamarin.iOS and Mono.Droid, Android SDK and the studio itself are gradually loaded onto the computer. Please be aware that you can choose which parts you want to install. The installer can find the ones that you are missing. A detailed description of the installation is available on the Xamarin website.
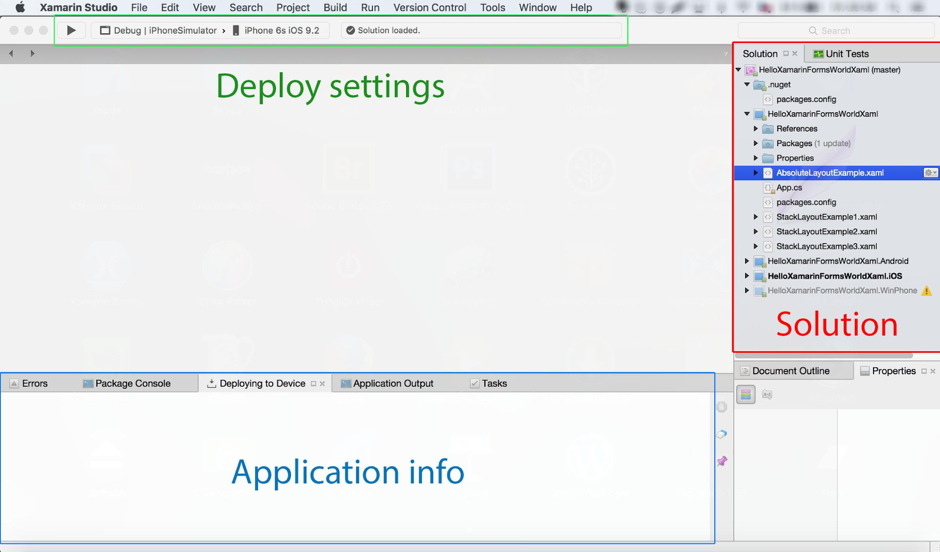
The whole studio is divided into three main parts. The first is a list of all available Solutions, Projects and files in the application that are connected to the Unit tests. In the next part, you can select the configuration and the device that you want to load and test the application on it. The last part is what is known as the application info, meaning the bar, where you can find the outputs from the application, errors when compiling, information about loading on the device and other items. The location of all elements can be changed.
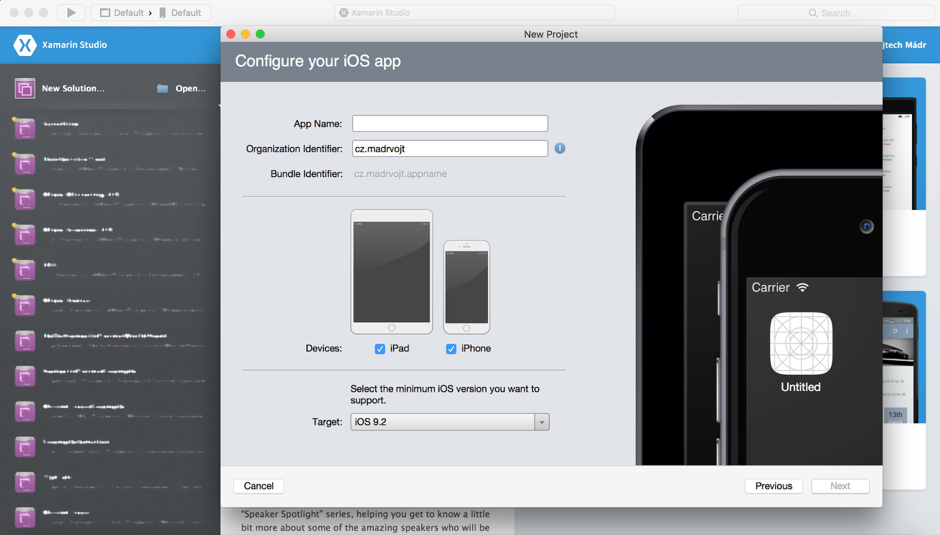
To create a new project, in our case an iOS application, you need to click on the item New Solution -> iOS -> Single View App. This way you get to the screen where you need to fill in the name of your application, choose the device on which the application should function and set the supported version of the system. After completing this data and after pressing the NEXT button the last screen awaits you, where you can change the name Solution and Project, set the inclusion of the project into git, creating a .gitignore file and the inclusion of Xamarin Insights and the Xamarin Test Cloud into the project (we will discuss these services later).
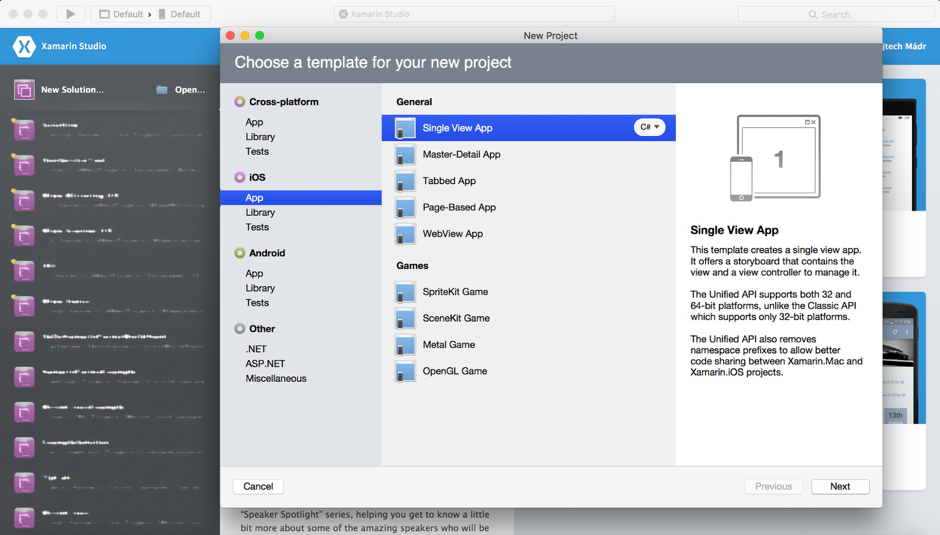
Creating a Project I
Creating a Project II.
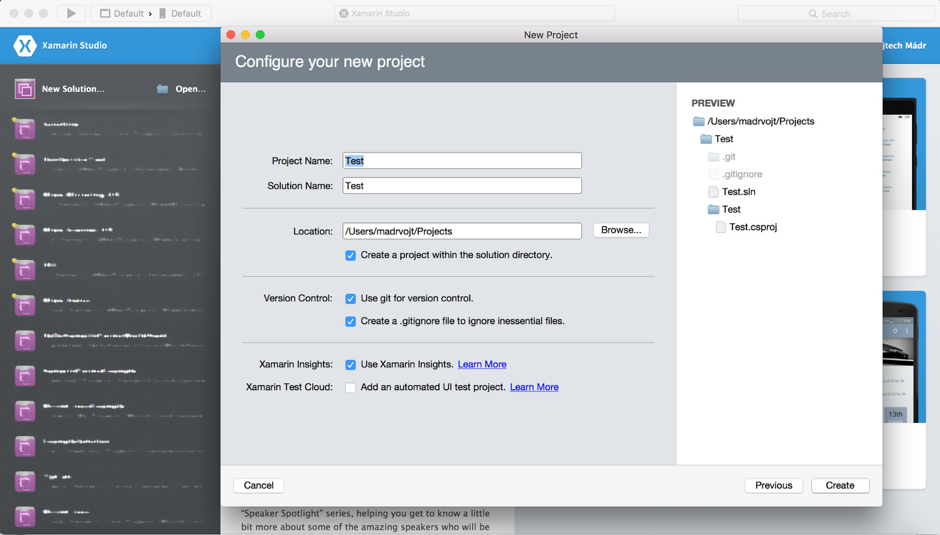
Creating a Project III.
When you click on the you Create item, a new project is created. Now in the part Solution will find the View Controller file, open it and write the following code in the ViewDidLoad method and save the file:
var label = new UILabel(new CGRect(View.Frame.Size.Width / 2 - 100, 0, 200, 100));

label.Text = "Hello Xamarin";

label.TextAlignment = UITextAlignment.Center;

View.Add(label);
Now there is nothing easier than to choose the device on which you want to test, and click the Start button (the arrow button). The project should now be built and the resulting screen looks like this:

We have thereby completed the first application. The Starter license is enough for the described procedure, but you need a computer / server with Mac OS X.
Hello World! in Visual Studiu
A similar procedure can be used in Visual Studio (VS). For full-fledged work you need a computer with Windows, as well as with Mac OS X, which are connected via a special bridge in VS. To make this possible, the station with Mac OS must be on the same network, and you must know the name and password of it. The connection functions for cable connection as well as WIFI.
VS uses Mac OS both for building iOS applications and for working with the iOS simulator through it. For Android application, a computer with Mac OS is not needed.
We tried the first project for Xamarin in this section. In the following part we’ll take a closer look at the composition of Xamarin.iOS and Mono.Android projects.
The previous installment of the series:
Xamarin: Introducing a tool for cross-platform development of mobile applications (Part 1)