
We will show you a few tricks on how to make toasts and dialogs easier. We will also launch activities and get to other useful tips which can be found in the Anko library. This article builds on the first part where we have laid the foundation on which we will now build our demo application.
Kotlin – Introduction to Anko for Android (2/4)

Previously in part 1, we got a quick introduction in how to start with Kotlin in the Android Studio and how to create and set up a new project.
Next, we got a general idea of what Anko is for and how to create a view (Anko Component).
In part 2, we will extend our knowledge of the Anko library. We will learn:
- How to show toasts and dialogs
- How to start a new activity
- How to use useful functions which Anko provides, such as running it in a background thread and UI thread
List of all parts of the series:
1. Setting up the Android Studio, project, and creating your first view in Anko
2. Buttons, Toasts, Alert Dialogs, Intents, UI & Background Threads
3. View Enhancements
4. Fragments & RecyclerView
Button – onClick Action and Toasts
We will go back to our SignInView and learn how to add the onClick action to a button. We will also learn how to read data from the EditText widget in Anko and how we can easily show a toast and later a dialog.
Let’s go back to our Sign-InView we created in the last article. Thanks to Kotlin and mainly to the Anko library, adding the onClick action to our button could not be easier.
button.setOnClickListener {
    Toast.makeText(act, "Hello, ${username.text}!", Toast.LENGTH_SHORT).show()
}
If we create a UI using Anko DSL (directly in code instead of in XML), then our code could look much easier:
button {
  onClick { toast("Hello ${username.text}") }
}
As you might have noticed, we used a different definition of the view of toast components in both cases. In the first case we view toast the classical Android way. In the second case we have used an extension function from the Anko library for viewing the toast. That means we do not have to deal with the regular mistake of forgetting to use the show() method. In both cases we view the toast with the time view set as “SHORT”. If we wish to view the “LONG” toast, then Anko offers the aptly named extension function:
longToast("Hello ${username.text}")
Now let’s focus on the EditText for entering the username. After clicking on the Sign-In button, we view the toast which would include the text entered by the user into the username field.
First, we need to add a reference to our username:
override fun createView(ui: AnkoContext<SignInActivity>) = with(ui) {
  val username = editText {
    ...
  }
}
Then we can add an onClick DSL block to our Sign-In button and view the text in the given toast:
override fun createView(ui: AnkoContext<SignInActivity>) = with(ui) {
  val username = editText {
    ...
  }
  ...

  button {
    ...
   onClick { toast("Hello ${username.text}") }
  }
}
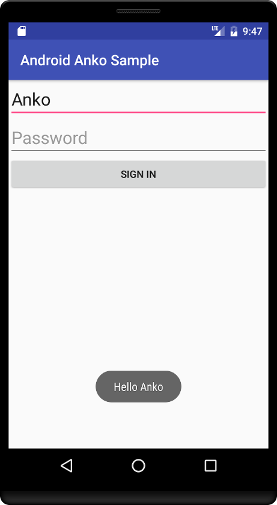
Our code is now ready, so let’s try to run the application and test whether we have done everything right. If we have, then you should see something similar to the following picture (if you entered an Anko text):
Just for the final check, your code in the Sign-InView.kt should look like this:
class SingInView : AnkoComponent<SignInActivity> {

  override fun createView(ui: AnkoContext<SignInActivity>) = with(ui) {
    verticalLayout {
      lparams(width  = matchParent, height = matchParent)

      val username = editText {
        id = R.id.usernameEditText
        hintResource = R.string.sign_in_username
        textSize = 24f

      }.lparams(width = matchParent, height = wrapContent)

      editText {
        id = R.id.passwordEditText
        hintResource = R.string.signIn_password
        textSize = 24f

      }.lparams(width = matchParent, height = wrapContent)

      button {
        id = R.id.signIn_button
        textResource = R.string.signIn_button

        onClick { toast("Hello ${username.text}") }

      }.lparams(width = matchParent, height = wrapContent)
    }
  }

}
Creating Sign-In Business Logic
Before we create our first business logic in connection to the Anko library article series, we need to prepare our domain objects first.
For the Sign-In process, we will create a new Kotlin file named DomainObjects.kt where all our POJO objects will be defined as data classes. Place this file into the new package named model (inside of the sign_in package). Then, create a first data class named AuthCredentials in this file and with these arguments:
data class AuthCredentials(val username: String,
                           val password: String)
Create a new package bl (or name it like you usually do for your business logic) and create a new interface ISignInBL.kt + implementation class SignInBL.kt.
Define a new function called checkUserCredentials in the ISignInBL.kt interface:
interface ISignInBL {

  fun checkUserCredentials(credentials: AuthCredentials): Boolean

}
Now, implement this method in the SignInBL.kt where you can check the username and password. You will not implement any persistent layer (we will explain this in future Kotlin articles, specifically in the ones about the Requery library) for our demo project. Perform the check by letting the user through when they enter username = frosty and password = snowman.
class SignInBL : ISignInBL {

  override fun checkUserCredentials(credentials: AuthCredentials): Boolean {
    return ("frosty".equals(credentials.username) && "snowman".equals(credentials.password))
  }
}
Great, now we just implemented simple business logic for our sign-in process. Next step is to add getting the entered value from the username and password edit texts and checking them. That is for case that user would not fill those fields in your app. Then use the business logic to check the user access (using the checkUserCredentials function).
Checking The Sign-In Form
Now we will add a check of the entrance fields (username and password) in the Sign-In form. First, we need to keep a reference to our EditText’s widgets (we already did it for the username at the beginning of this article):
val username = editText {
  id = R.id.usernameEditText
  hintResource = R.string.sign_in_username
  textSize = 24f
}.lparams(width = matchParent, height = wrapContent)

val password = editText {
  id = R.id.passwordEditText
  hintResource = R.string.signIn_password
  textSize = 24f
}.lparams(width = matchParent, height = wrapContent)
Next we need to create a new private function handleOnSignInButtonPressed with these arguments:
- ui: AnkoContext
- username: String
- password: String
It will replace our “Hello” toast from the onClick DSL action in the Sign-In button:
button {
  ...
  onClick {
    handleOnSignInButtonPressed(
          ui = ui,
          username = username.text.toString(),
          password = password.text.toString())
  }
}.lparams(width = matchParent, height = wrapContent)
Alert Dialog
Anko contains a DSL block for viewing dialogs:
alert(message = "Hello, I'm Alert Dialog", title = "Cool Title") {
  yesButton { toast("YES pressed!") }
  noButton { toast("NO pressed!") }
}.show()
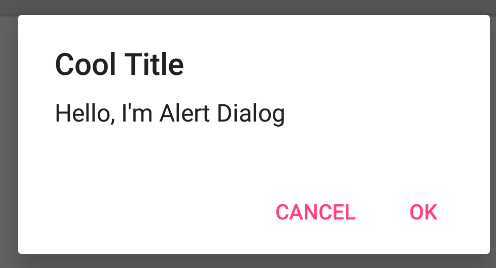
Pretty easy, don’t you think?
Now we know how to show the Alert dialog in Anko so we can easily try this experience out in our demo application. We insert the code for viewing the dialog into the function handleOnSignInButtonPressed where we check whether the user credentials are correct and if they are filled in by the user.
private fun handleOnSignInButtonPressed(ui: AnkoContext<SignInActivity>, username: String, password: String) {

if (username.isBlank() || password.isBlank()) {
    with(ui) {
      alert(title = R.string.sigIn_alert_invalid_user_title,
              message = R.string.sigIn_alert_invalid_user_message) {

        positiveButton(R.string.dialog_button_close) {}
      }.show()
    }
  } else {
    // TODO
  }
If you checked the inserted code in more detail, you surely noticed that I use the isBlank() function. This function is to be found in the stdlib Kotlin library and its purpose is to check whether the inserted text is empty or whether it contains white characters. We also used the with{} expression where we placed the Alert dialog definition. The ui argument is here because we are defining the UI in the Anko widget and we need a reference for the context of this component for using the extension function from Anko.
private fun handleOnSignInButtonPressed(ui: AnkoContext<SignInActivity>, username: String, password: String) {
    if (username.isBlank() or password.isBlank()) {
      with(ui) {
        alert(title = R.string.sigIn_alert_invalid_user_title,
                message = R.string.sigIn_alert_invalid_user_message) {
          positiveButton(R.string.dialog_button_close) {}
        }.show()
      }
    } else {
      // TODO
    }
  }
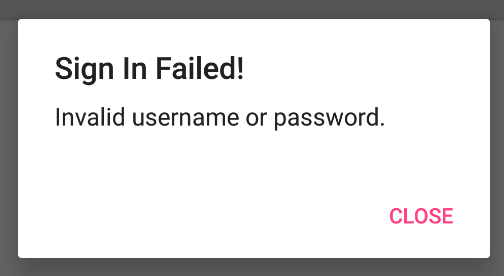
Let’s run the application now and you should see the alert dialog if the username and/or password field is empty when the Sign-In button has been pressed:
Oops, I almost forgot to show the definition of new text strings:
<!-- strings.xml -->
<resources>
    ...
    <string name="sigIn_alert_invalid_user_title">Sign In Failed!    </string>
    <string name="sigIn_alert_invalid_user_message">Invalid username or password.
    </string>
    <string name="dialog_button_close">Close</string>
</resources>
How to Call Activity/Fragment From AnkoComponent
In a real application, I guess that most of you are using the MVP pattern or even the new Architecture Components introduced at Google I/O 17 to separate logic from the UI definition of activity/fragment to have cleaner code. We will not use any of those in our demo application, but if you are interested in one of the MVP frameworks called Mosby, you could take a look at my github project kotlin-anko-demo where I tried to connect Kotlin, Anko, Mosby, and other libraries.
For communication between Activities, Fragments, and others components, I use RxJava & RxKotlin via definition of RxBus. We will use only the communication between the Activity and UI via the Anko component from the related Activity in our demo.
If you remember from the first article, when you create AnkoComponent<T> you must define a generic type T as the component owner. Thanks to that we can access the Activity from the connected component, meaning from the owner. That means we can easily access the activity from our SignInView component by calling it e.g. ui.owner.someFunction(...).
Open the SignInActivity.kt class and add a new function with the name authorizeUser:
class SignInActivity : AppCompatActivity() {

  ...
  fun authorizeUser(username: String, password: String) {
    // TODO
  }
}
Let’s go back to the SignInView.kt where we left TODO in the else branch from the previous implementation. Inside the function handleOnSignInButtonPressed we call a new function, authorizeUser:
// SignInView.kt
private fun handleOnSignInButtonPressed(ui: AnkoContext<SignInActivity>, username: String, password: String) {

 if (username.isBlank() or password.isBlank()) {
    with(ui) {
      alert(title = R.string.sigIn_alert_invalid_user_title,
              message = R.string.sigIn_alert_invalid_user_message) {

        positiveButton(R.string.dialog_button_close) {}
      }.show()
    }
  } else {
    ui.owner.authorizeUser(username, password)
  }

}
Now let’s come back to the SignInActivity.kt. There we will learn how we can run the code on the background thread easily by using the Anko library.
Asynchronous Tasks
All of you certainly know what kind of hell it is to use the asynchronous call in a standard Android SDK. The Anko library introduced a better way to use async:
// Example from Anko documentation
doAsync {
    // Long background task
    uiThread {
        result.text = "Done"
    }
}
Note: The examples are related to the 0.9 version. We can use Kotlin Courotines in newer versions of the library, but that is another topic for a different article.
If you need to put another function to async, then you can use the doAsyncResult(function_call_here) function:
doAsyncResult { callSomething() }
We can even use our own instance of executor for executing the operation in the background:
// Example from Anko documentation
val executor = Executors.newScheduledThreadPool(4)
doAsync(executor) {
    // Some task
}
So we just learnt about another great part of the Anko library, so let’s try it out.
In our SignInActivity, we need to check if the user who is trying to sign in with our app has the correct credentials in the Sign-In form. In a real application, we would have a user’s credentials stored in the database but in our case to make it simple, we will not deal with it in this article (Anko includes many extension methods for work with SQLite, but it is a topic for a different article). We can perform the check of user credentials in the background thread (async way):
class SignInActivity : AppCompatActivity() {
    ...
fun authorizeUser(username: String, password: String) {
  doAsync {
    val authorized = signInBL.checkUserCredentials(
          AuthCredentials(username = username, password = password))
    activityUiThread {
       if (authorized) {
          toast("Signed!!!")
       } else {
          view.showAccessDeniedAlertDialog()
       }
    }
   }
}
In a code snippet above, we checked a user’s credentials in the background thread (the async way) and the result has been delivered back to the UI thread where toast will be shown, provided the credentials are correct. Otherwise, the Access Denied Alert dialog will appear.
Note: uiThread() acts quite differently for different classes. When called in Activity, code in lambda would not be executed if isFinishing() is true. Use ctx.uiThread { } if this is an unwanted result.
Full code of SignInActivity is supposed to be:
package com.example.android.anko.sample.sign_in

import android.os.Bundle
import android.support.v7.app.AppCompatActivity
import com.example.android.anko.sample.sign_in.bl.ISignInBL
import com.example.android.anko.sample.sign_in.bl.SignInBL
import com.example.android.anko.sample.sign_in.model.AuthCredentials
import org.jetbrains.anko.activityUiThread
import org.jetbrains.anko.doAsync
import org.jetbrains.anko.setContentView
import org.jetbrains.anko.toast

class SignInActivity : AppCompatActivity() {

  private val signInBL: ISignInBL = SignInBL()
  private lateinit var view: SingInView

  override fun onCreate(savedInstanceState: Bundle?) {
    super.onCreate(savedInstanceState)
    view = SingInView()
    view.setContentView(this)
  }

  fun authorizeUser(username: String, password: String) {
    doAsync {
      val authorized = signInBL.checkUserCredentials(AuthCredentials(username = username, password = password))

      activityUiThread {
        if (authorized) toast("Signed!!!") else view.showAccessDeniedAlertDialog()
      }
    }
  }
}
In the next step we will go back to the SignInView.kt, because we need to implement the showAccessDeniedAlertDialog function which we added to the activity in the previous step:
fun showAccessDeniedAlertDialog() {
  with(ankoContext) {
    alert(title = R.string.sigIn_alert_access_denied_title,
            message = R.string.sigIn_alert_access_denied_msg) {

      positiveButton(R.string.dialog_button_close) {}
    }.show()
  }
}
<!-- strings.xml -->
<string name="sigIn_alert_access_denied_title">Access Denied</string>
<string name="sigIn_alert_access_denied_msg">You do not have permission to access this application!</string>
In this method I use the variable ankoContext, but where did it come from? It is a global variable with the definition of Anko context (previously known as ui: AnkoContext<SignInActivity>), so we can access it also from other functions:
class SingInView : AnkoComponent<SignInActivity> {

  private lateinit var ankoContext: AnkoContext<SignInActivity>
  override fun createView(ui: AnkoContext<SignInActivity>) =
   with(ui) {     {
    ankoContext = ui
    ...
  }
}
Intents
In this section I would like to show you how Anko could be useful to make your life easier with some useful intent functions.
// Took it from original Anko documentation
// Make a call
makeCall(number)
// Send a text
sendSMS(number, [text])
//Browse the web
browse(url)
//Share some text
share(text, [subject])
//Send a email
email(email, [subject], [text])
//Arguments in square brackets ([]) are optional
If you take a look into the source code of the Anko library, those functions are nothing else than extension functions:
fun Context.makeCall(number: String): Boolean {
    try {
        val intent = Intent(Intent.ACTION_CALL, Uri.parse("tel:$number"))
        startActivity(intent)
        return true
    } catch (e: Exception) {
        e.printStackTrace()
        return false
    }
}
So we now know we can use extension functions from Anko when working with intents. So let’s try it out in our first demo project. We will learn how to run the SignInActivity from the MainActivity class.
If we do not need to enter any flags or parameters when launching the activity, we can easily write:
startActivity(Intent(this, SignInActivity::class.java))
If we need to set the parameters, our code would look like this without using the Anko library:
val intent = Intent(this, SignInActivity::class.java)
intent.putExtra("checkUser", true)
intent.addFlags(Intent.FLAG_ACTIVITY_SINGLE_TOP)

startActivity(intent)
By using the extension functions from the Anko library, we can edit the code to make it look like this:
startActivity(
intentFor<SignInActivity>("checkUser" to true).singleTop())
We will not set any flags or arguments in our demo application so our result code for MainActivity is as follows:
class MainActivity : AppCompatActivity() {

  override fun onCreate(savedInstanceState: Bundle?) {
    super.onCreate(savedInstanceState)

    startActivity(intentFor<SignInActivity>())
    finish()
  }

}
Summary of Part 2
In this article from a series about the Anko library we learnt how to show toasts and dialogs on Android. We also tried to define different actions/action listeners for UI components. It was mainly the onClick action added to the Sign-In button.
We also explained an interaction between the AnkoComponent (our SignInView) and Activity in a simple way and you learnt how to use async calls and run operations in the background.
In Part 3 we will come back to UI and play with it to improve it.